The design of firefighter’s helmets in America has not changed very much at all since the 1800s. The distinctive shape and design of these helmets has in fact become famous, and can be recognized the world over.
Although the materials may have altered slightly, and new features been added along the way, the old saying ‘if it ain’t broke, don’t fix it’ really has applied to this specialist headgear for years.
However, these days many firefighter helmets are factory made in large quantities rather than being handcrafted as they used to be. For this reason, a helmet may lack the distinctive bend in the brim that it is so famous for.
But don’t fear; if you want to give your leather fire helmet a more pronounced ‘Bronx Bend’ or indeed, simply want to mould it to fit your head more comfortably, then you have come to the right place.
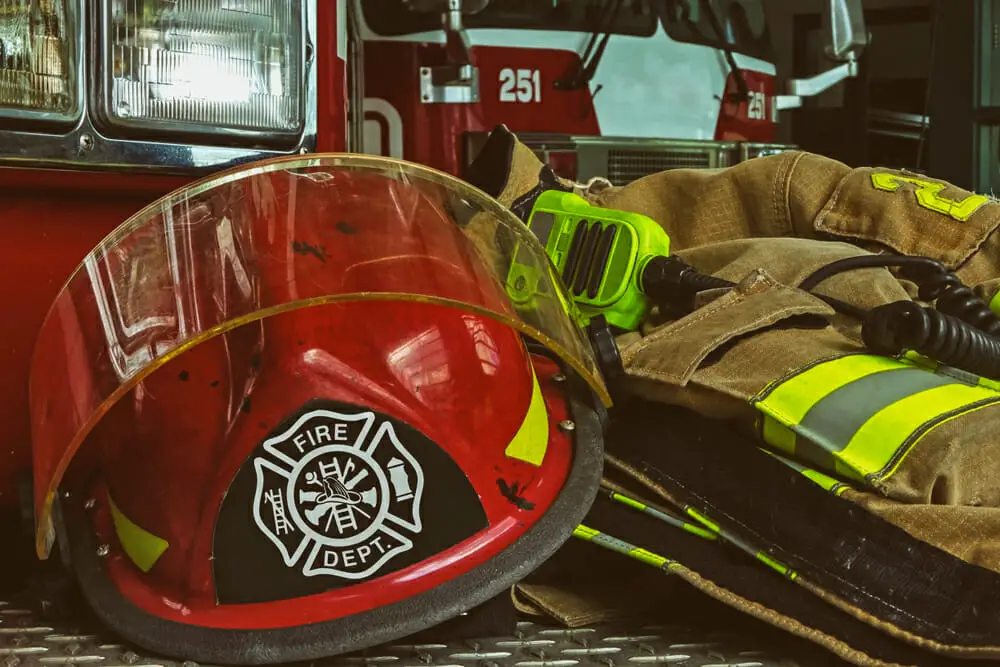
In this article, we will go through the simple steps that you can take to bend your leather fire helmet into whatever shape you require it to be.
We will also talk about how you can fix cracks and nicks in your helmet to restore its smooth surface, and about the history and science behind this iconic headgear. So read on for all your leather fire helmet maintenance needs.
How To Bend Your Fire Helmet: A Step by Step Guide
If you feel that your leather fire helmet is a little too flat in the brim, then you may want to try to increase its curvature.
The ‘Bronx Bend’ is the name given to the distinctive arch from the front to the back of a fire helmet which causes the back brim to cover your neck thoroughly and protect it from injury.
Note: Any helmet that is made from leather is at risk from sustaining damage and marks. Leather is animal hide, and much like human skin, it creases and weakens the more it is bent and manipulated.
Therefore, if you attempt to bend your own fire helmet at home, you should be warned that you could cause it to dent, crack or even tear.
That being said, should you still want to give it a go, you can create the Bronx bend, or indeed mould the shape of your leather fire helmet to better suit your head, by following these easy steps:
- Firstly, place your leather helmet in a deep sink or container. The suitable container will be deeper than the helmet is high, and wide enough to hold the helmet without causing the sides to bend.
- Next, fill the deep sink or bucket with hot water until your helmet’s brim is completely submerged. The waterline should rise above the brim of the helmet all the way around, so that the whole thing is covered, and the water should fill the interior as well.
- If your water is not very hot, add a few kettles of boiling water to increase the temperature. The heat of the water will affect how supple the leather becomes so you want it nice and toasty. However, be sure to take care not to scold yourself on water that is too hot.
- Leave your leather helmet in its hot water bath for 5 minutes. This is approximately the amount of time it will take for the material to become soft to touch and malleable - however as the water temperature will vary, be sure to test your leather and leave it for a few more minutes if it is still stiff and rigid.
- If you are satisfied with the softness of the leather, take your helmet out of the water and promptly begin moulding it. You must complete your moulding in approximately 10 minutes as the leather will become less flexible as it cools and you will no longer be able to bend it.
- Use a bullnose countertop edge or similar shaped surface to help you achieve the curvature of the Bronx Bend. Simply press the brim against the countertop and run it over it whilst applying pressure. You should see the helmet visibly bending as you do so.
- Alternatively, use your hands to push, pull and press the brim into whatever shape you want it in order to make it suit your head. Whether you want it to be narrower or wider, apply the appropriate pressure until you see the helmet’s shape is altered.
- If your bend affects the inner arch of your helmet, you may also have to bend the metal ring which supports it and gives it structure. To do this you must simply apply pressure in the correct direction until the ring is curved as you wish it to be.
- Now, all that is left is to leave the helmet for 30 minutes at room temperature so that the leather can cool and solidify. DO NOT place your helmet in a refrigerator or freezer to speed up the cooling process as it will cause cracks to appear on the surface.
- As this reshaping is not an exact science, you may need to repeat the process several times before you achieve the shape that you desire. DO NOT try to hurry the process by cutting corners of heating the leather in more extreme ways. Just have patience and keep shaping, cooling and testing your helmet until you get it right.
Having a well fitted fire helmet that protects your delicate neck area will really enhance your ability to perform your firefighting job with confidence and comfort.
How To Fix Cracks In Your Leather Fire Helmet: A Step By Step Guide
To fix small cracks and marks in your leather fire helmet simply:
- Firstly, fill the cracks with epoxy resin or crack repair sealer
- Secondly, fill any parts of the seams that are missing or look fragile with cement to seal them
- Allow the resin and the cement to dry fully
- Use sandpaper to sand down any lumps and bumps that the resin may have created, until your helmet is smooth and crack free
Why Are Fire Helmets Shaped The Way They Are?
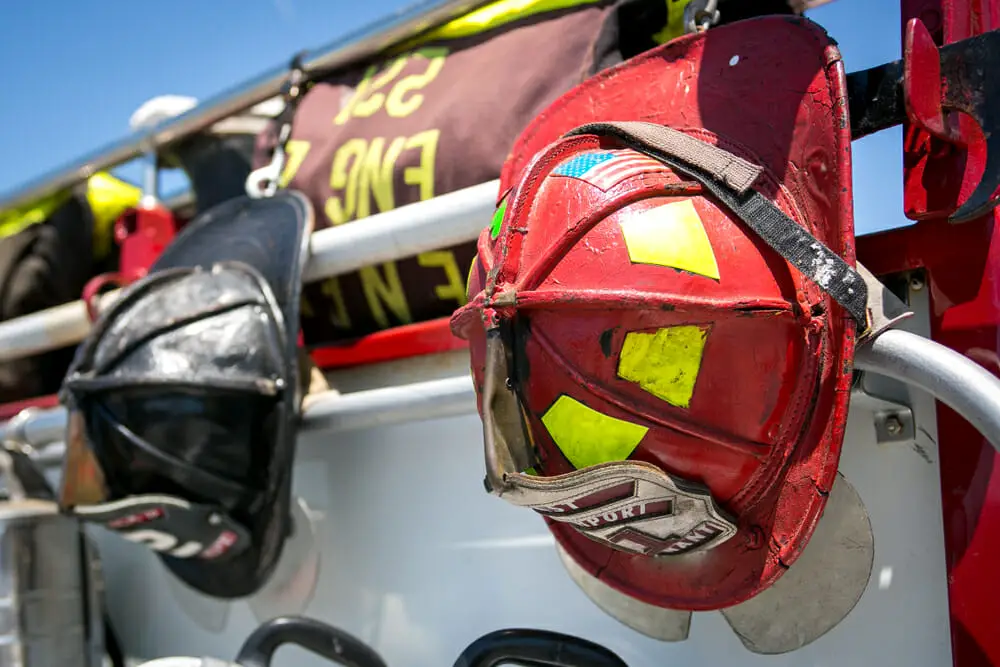
Fire helmets have a very famous design - but this design is not just so that they look cool. There are serious health and safety reasons behind each of the design features.
Although there is not one standard design for all firefighter’s helmets across the USA, they all share very similar design features which hark back to the early helmets used by firefighters in the 1800s.
During the industrial revolution, American towns and cities began to experience many more fires as a result of all the new machinery and technology that was being used.
Factories and industrial enterprises did not have all the rigorous health and safety checks back then that they do now, and so accidents were frequent and fire departments became particularly necessary.
As the industrial revolution progressed, and factory owners began to learn from their mistakes, so did the fire departments. They began to improve not only their firefighting techniques, but also their equipment and their personal protective clothing.
The distinctive firefighter helmet shape was developed around this time in response to the many hazards that firefighters were finding themselves exposed to. In the 1850s, Henry J. Gratacap came up with the first Cairns & Brother’s leather helmet design, and it has barely changed since.
The features include:
- The high dome shape of the helmet is designed to absorb the impact of falling objects that could otherwise knock a firefighter out cold. It also helps to protect against smaller impacts like bumping your head against low ceiling or low hanging beams.
- The curved bowl of the helmet is designed so that debris and fluid runs and rolls off the helmet rather than pooling or getting caught on it.
- The wide brim of the helmet is designed to protect the firefighters face and neck from sparks, flames and falling objects. It is tilted downwards at the back of the head so that water and other fluids will run right off. This curvature is more pronounced on some helmets than others, and is often referred to as the ‘Bronx Bend’ as it is the style of helmet worn by New York firefighters.
- What is more, the brim of the helmet is widest at the back to ensure that the firefighters neck does not get scorched or injured during an emergency.
- Although not all fire departments have the same color of helmet, yellow is the traditional color associated with the firefighter helmet and it is used in order that the firefighters can be easily visible even through thick smoke.
Why Are Fire Helmets Made From Leather?
Leather may seem like an unlikely material for fire helmets to be made from, but it is in fact the most traditional material that all classic firefighter helmets are fashioned out of.
- Leather is incredibly hard wearing and durable, which is an essential quality for a fire helmet due to all the heavy duty wear and tear that it will be put through.
- When reinforced, leather is incredibly strong and great at absorbing hefty impacts in order to protect a firefighter’s skull.
- Leather is naturally flame retardant as it is very difficult to make it catch fire. When treated with special flameproof coating it is totally non-flammable and offers great protection against fire and sparks.
- Leather is water resistant but due to its porous properties it is not completely waterproof.
- When warmed, leather is malleable, making it an ideal material to be moulded and sewn into the distinctive fire helmet shape. However, when it cools, leather becomes hard and structured, meaning it is able to provide excellent protection against bumps, knocks and impacts.
These traditional fire helmets are hand crafted and are considered works of art by many people. Though they have a truly important health and safety function, they are also expertly sewn and put together with care.
Many firefighters choose to wear a leather helmet for this very reason, and because it connects them to the traditions and principles of the vocation.
The Argument / Controversy Surrounding Leather Fire Helmets
In 2017, there was a campaign to ban leather from firefighting PPE altogether. This is because some authorities said that leather was ‘topheavy and unsafe’ compared to other more modern alternatives.
Many firefighters spoke out against this, saying that leather fire helmets have been keeping firefighters safe for centuries.
Many people now argue that leather helmets are actually dangerous. Due to the porous properties of the material, leather absorbs chemicals and toxins that it is exposed to. It is then nearly impossible to fully clean the helmet so that those chemicals are removed.
Leather is also not entirely flame proof and has been known to catch fire when exposed to extremely high temperatures.
What is more, leather is a heavy material, and becomes heavier still when it absorbs water and moisture. Therefore, some people argue that leather helmets are too cumbersome and heavy to be safe to use, and that they actually impede firefighters rather than aid them.
In 2012 the NFPS (National Fire Protection Association) implemented new rules which mean that firefighters have to upgrade their helmets every 10 years.
The rule states that the old helmets must be destroyed so that they cannot be sold on and worn by someone else, creating a potential health risk in the future.
This rule was passed in order to ensure the quality and condition of every active helmet is up to safety standards, however, many firefighters protested against the ruling, saying that it meant thousands of perfectly good helmets would go to waste.
Firefighters argued that their helmet was not just any old item of protective clothing, but a badge of honor.
Many felt that they formed a bond with their helmet having been through so many perilous experiences with it, and so it had sentimental value which in turn gave them greater confidence and security whilst carrying out their work.
What is more, fire helmets can be highly expensive items to buy, and this ruling therefore costs firefighters extra money.
What Other Materials Are Modern Fire Helmets Made From?
These days, fire helmets are made from thermoplastic and fiberglass as well as leather. These types of helmets are made from thermoset resins which do not ‘melt’ at high temperatures like normal plastics and glass fibers do, but instead chemically degrade.
They do not set on fire and are completely flameproof, as well as being lightweight and strong.
Modern helmets also have design features that improve their overall functionality. These include goggles or eye shiels, impact absorbing inner shells, ear and neck flaps and chin straps for an extra secure fit.

